Do you have a store on EcomFly and want to track traffic on your site while optimizing ads on Facebook and Instagram?
Adding the Meta Pixel to your store’s website is a key step that will allow you to precisely analyze user behavior and improve the effectiveness of your advertising campaigns.
With the Meta Pixel, you can:
Track conversions – see how many people actually buy your product
Optimize ads – reach the right audience at the right time
Create remarketing groups – win back customers who visited your store but didn’t make a purchase
In this article, we’ll show you step by step how to easily add the Meta Pixel on the EcomFly platform.
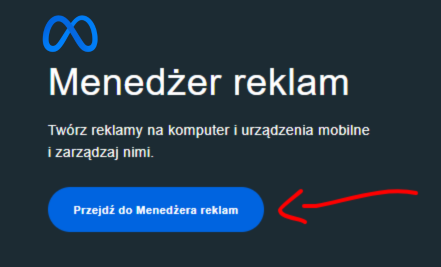
Go to Meta Ads Manager – if you don’t have a Meta ads account, you can create one in a few minutes.
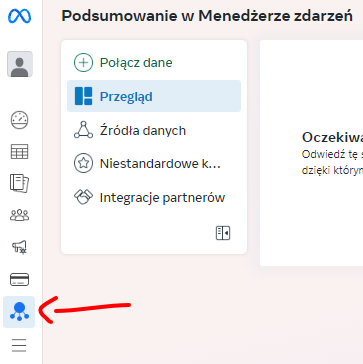
Once you’re in Ads Manager, go to Events Manager.
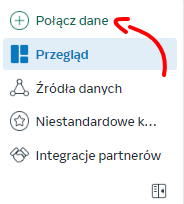
Select “Connect Data”.
In “create a new data source,” select the “Internet” option.
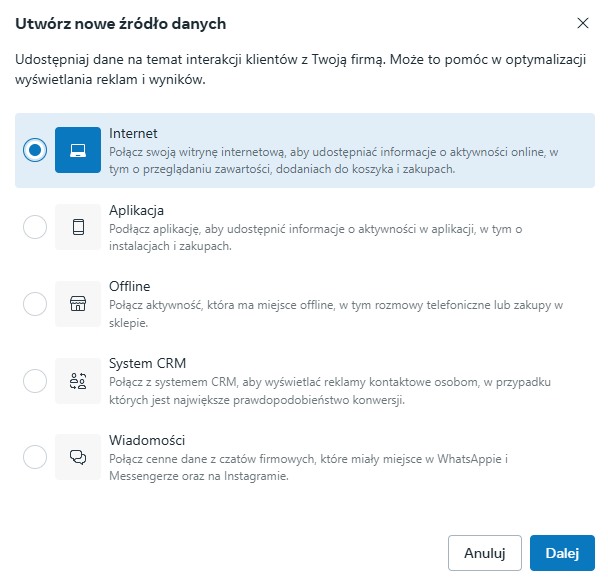
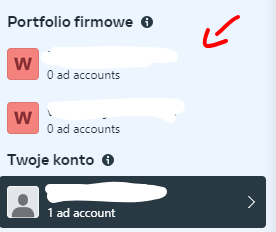
If you can’t select this option as shown below, make sure you’re using a business portfolio profile.
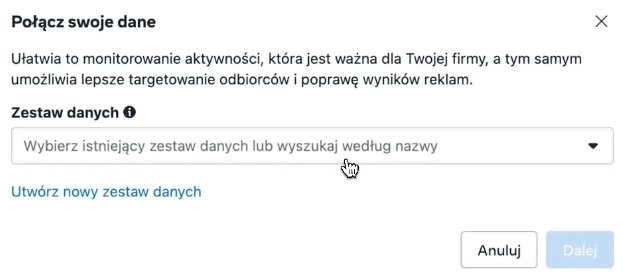
Create a new data set or select an existing one (if you’ve already created it).
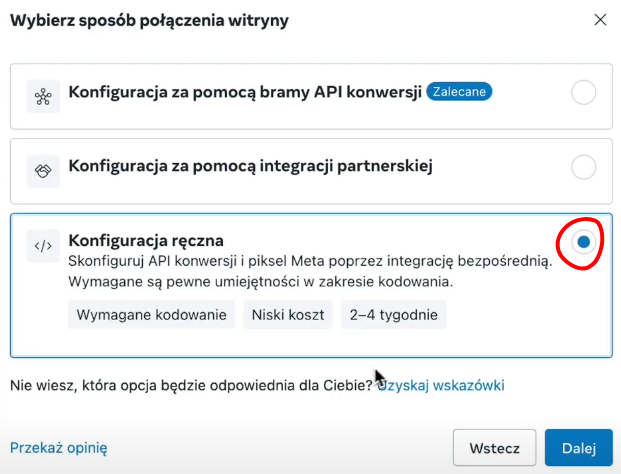
Select manual website connection setup.
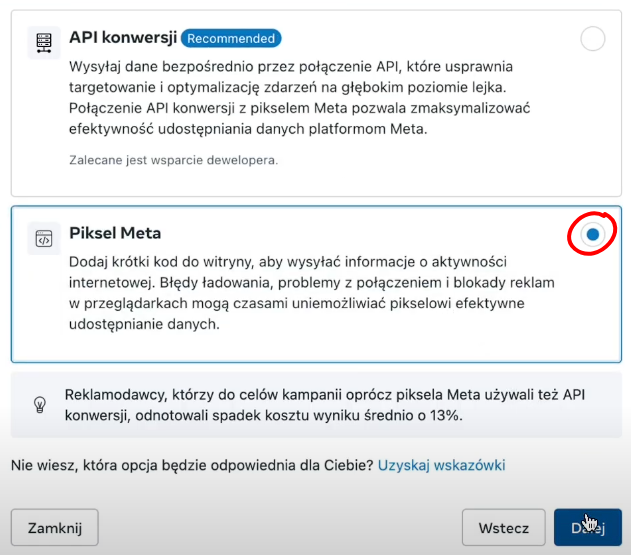
Select the “Meta Pixel” option.
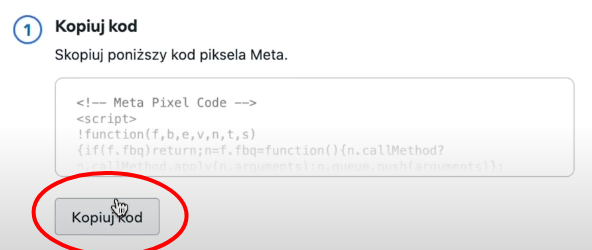
Copy the generated Meta Pixel code.
Paste it into your EcomFly store.
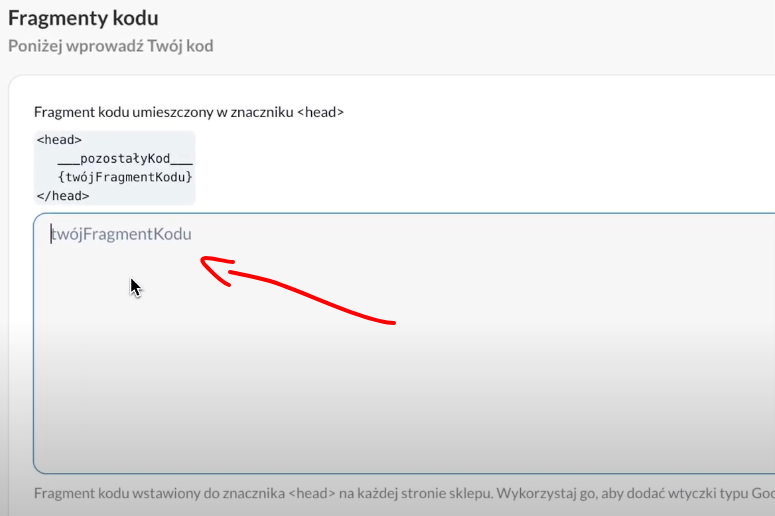
To do this, go to settings → code snippets → and paste it in a visible place.
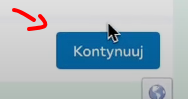
Go through the final pixel settings by clicking “continue” in Ads Manager.
Congratulations!
You have successfully added the Meta Pixel to your EcomFly store.
Now you can more effectively track conversions, optimize your ad campaigns, and precisely target specific audience groups.
Remember to regularly check your data in Events Manager and test different advertising strategies — the more you know about your customers from the pixel, the better you can tailor your ads.
